How To Repair, Finish & Restore A Drywall
Some of us are adept at home improvement projects. For those of us that are not, we simply dial up a local professional and trust them to come into our home and get it back in working order. However, there are a few of us that know that, with the right tools and knowledge, you can improve your home on your own.
The tools that you need for this project are a drill, a drywall saw, a utility known, construction adhesive, drywall tape, and masking tape. You should also remember that it is important to wear protective clothing, work gloves, goggles and a dust mask when dealing with drywall.
With drywall, you can always start the repair process by scraping away loose debris from the hole. It should be covered with fast drying spackle that is level with the wall’s surface and let it dry 24 hours. Make sure that it is sanded smooth with sandpaper.
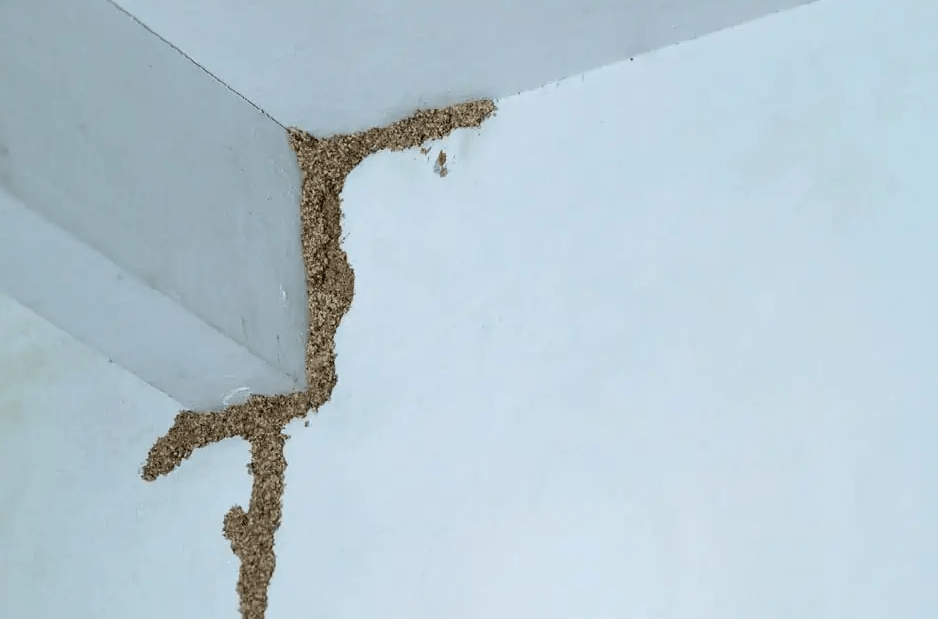
Image: Termites eating drywall paper.
Drywall repair and drywall finishing for popped nail heads required one other piece. Drive a drywall screw approximately one and one-half inches above the popped nail head into the stud to reattach drywall to it. Then, sink the screw’s head just below the surface because it will need to be covered with spackle. Drive in the popped nail, and covered it will spackle until level. As mentioned, wait 24 hours and then sand.
For small holes, which are common, the first step is to place the self-adhesive mesh patch over the hole. Using a drywall knife to cover the spot with a lightweight joint compound, making sure to use a crisscross pattern. Increase pressure and angle the knife to feather the edge of the patching. Allow this to dry, and if you need a second coat, then repeat the process. Again, it will dry and be sanded.
Slightly large holes, typically over 6 inches, the California Patch is used. Cut a piece of drywall into a square, making sure that it is 2 inches larger in both width and height than the area to be repaired. Score the back of the drywall with a knife or box cutter an inch from all sides, and snap of the gypsum but leave paper intact. Hold this patch over the hole and trace around the edges, which will be cut with the drywall knife. This method is an excellent example of making a big impact on a small budget, as it allows you to repair larger holes without the need for extensive materials or professional help.
Once the hole in the wall is cut, apply joint compound to the paper backing, and the gypsum should fit into the new hole. Press the paper edges covered in the mixture into place around the hole. Once placed into the hole securely, apply the mixture. Often, two coats are necessary, so be patient.
Regardless of hole size or area, make sure to finish drywall repair with a light sanding. It means a smooth finish and seamlessness between your patching and your unaffected wall. Cover with primer and dry sufficiently before painting.
While repairing and finishing drywall is an easy project for some, it may not be for you, do your research to make sure that you find a respectable and experienced contractor to get your home running smoothly and looking like new again.
To book a handyman today for your home’s drywall repair and finishing as well as other home improvement needs, call 916-472-0507 or email us at estimates@sacramentohandyman.com.